Saturday, March 26, 2011

Just a couple more Lay Outs

I love that David can be so goofy, I tried to convey that in this double lay out.


I'm trying to carry the similar elements throughout all LO's for this particular set of pictures.

I have so many pictures to tell the story, sometimes a random bunch makes a cute page.

I like to use the same line of papers, and elements for particular events and pictures. These are all from our summer vacation 2 years ago. The papers are from a line by Chatterbox, as are the journaling cards and chipboards and brads. The alphas are from Doodlebug, I bought two sets and was able to make 7 titles so far....with a few random letters left over, I'll post a picture of what's left, it is great when you can use up a lot of one set.
Anyhow, gotta run for today, thanks for looking.
Cheers,
Viviana

Tuesday, March 22, 2011

David's "Hollywood" Birthday Bash

When I asked David what kind of party he wanted, he said a Movie Star party would be nice...never been to one, so I had to do some research on the net to come up with just the right stuff!
There are of course tons of online stores that sell everything from mini Oscar statuettes, to red carpets and pre-made invites. I am however, a DIY kind of girl, so even thought I did cave and bought a few items at Canuck Amusements (the local party and trophy store), I made do with our great Dollarama and Dollar Giant stores, my trusty printer (not so trusty with the colour black though) and handmade/homemade items for the party.

David chose the TV dinner cupcakes, (from the book, Hello Cupcake) which turned out perfect, everyone was kinda not sure what to make of them at first, they looked that real! They also had popcorn in cute paper popcorn boxes (from Dollar Giant), Corn Dogs and curly fries, and I put out goblets full of candies such as skittles, licorice and fruit chews. They love it that I let them eat candy first , before thy even had supper, but what are parties for? to do things you don't normally do and eat things how you want!!!

The peas and carrots are Skittles and Startburst, the mashed is plain frosting, melted caramel and fruit chew butter.

Fried chicken drumsticks! That's a Timbit and frosting covered with cornflakes, topped with a white chocolate bone.

It looks lovely and ready to be eaten.
I also made some white chocolate covered pretzels, David's fave.


The decor wasn't too hard to do, my house has a lot of clutter, shelves full of books and board games and lots of toys, so I moved as much as I could out of the way, and a lot of the decor was kept up high.


The disco ball was a must, and that's birthday tinsel/garland.

The kids got VIP passes at the door, sunglasses and a boa if they wanted.
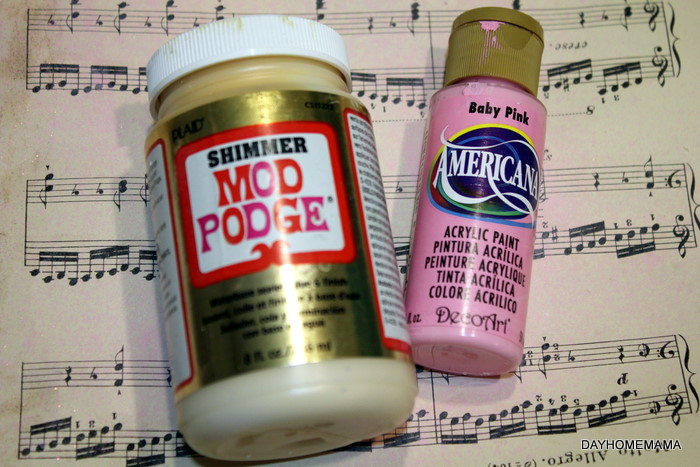
For their award they got a Golden Letter and had to make a speech if they wanted.

That's my David as Michael Jackson, walking the "Red" carpet I laid down.


I didn't do real goodie bags full of junk, they got a paper popcorn bag where they put their sun glasses, stickers from playing bingo (we used Spiderman and Tinkerbell stickers to mark our numbers, and I have a real bingo set with the spinner ball!!), their letter (Dollar Giant letters, painted in gold and trimmed with glitter), their boa and they got to take home their VIP passes (printed at home and used Dollar store name badges to put them in). I figured they ate a lot of candies and sweets at my house, they didn't need any more. They burned off some energy outside and came in had popcorn and watched a movie. I imagined it being chaos (9 seven year old's sitting down for a movie, am I crazy???) but it was great, everyone sat, with their box of popcorn and watched "Marmaduke", perfect movie for that age too.

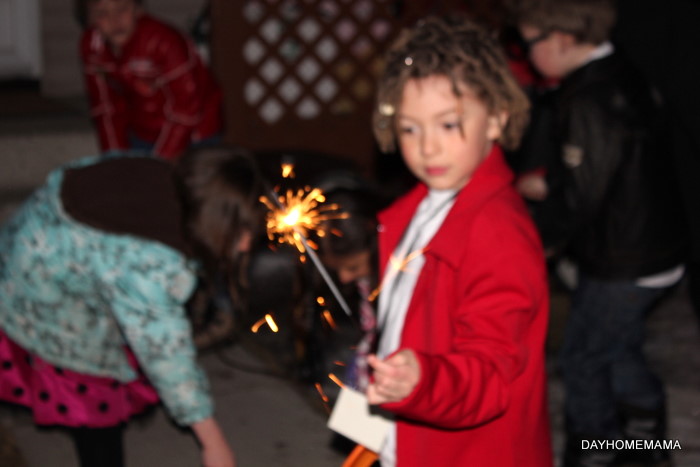
Before sitting down to a movie, the kids all went outside and burned a large sparkler each, and ran around playing tag for a bit.
I think the party was a success, and everyone had a great time!

Not sure how we will top it for next year....but I may just have to start the planning now!
Cheers,
Viviana

Thursday, March 17, 2011

Upcycled T Shirt, Done pretty!

I made a black cardi/shrug from an old black t-shirt. Not a new idea, but this was my take on it. I went back to the same post on CraftStylish for the basic instructions and ran with it on my own from there. Looks very cute and perfect for my summer dresses.
I think the sleeves make it really feminine, considering it was a plain black t-shirt before.


Instead of ruffles on the front, I put pleated ruffles on the collar.
 Anyhow, it's fun to make a new wardrobe out of old stuff, cluttering my closet. Our weather here in Calgary is somewhat warm, but not always warm enough for strappy summer dresses, so this will help. I can wear them and throw this over top, so the chill doesn't get me!! Hope you like!


Chic on a Shoestring Decorating

Cheers and happy St. Patrick's Day!!
Viviana

Saturday, March 12, 2011

The KISS principle at work.


I am not sure about you, but lately, I've been enjoying using the KISS principle when it comes to card making and scrapbooking. Since my design school days, my style has always been fairly linear, with clean lines and a firm direct approach at my subject. Although I sometimes enjoy looking at over embellished, decor heavy styles, I still like my stuff to be to the point and concise, I like to not have you search all over my pages or cards to find the meaning, to me it looses it's appeal.
Anyhow, enough preaching, what do you think. Keeping It Simple Sweetie (and Straightforward too) seems to be working for me. Not much clutter and still pretty right?


Just another simple card, a couple of layers, and plenty of meaning.


Ok, I must run for the day, Cheers everyone!
Viviana

Cherished Treasures”=Cherished Treasures”=
That is so awesome hey??

Tuesday, March 8, 2011

The Elves Have Finally Moved In! | craftgawker

The Elves Have Finally Moved In! | craftgawker

A couple more pretty tags, Enjoy.

I really love that Tim Holtz masking tape!


Dollar store pins, there are so many to chose from!


I also love the stamp that makes it look like platters, it's from M's.

Flower pin, Dollar Store!


You can really see how they are all similar and unique at the same time.


Yes, these are definitely fun to make!


Cheers,
Viviana

Monday, March 7, 2011

Weekend Creations

 So after making a few different "glimmer" sprays, this is what I did with the test tags.

I love how the glimmer plays with the pearl and it works so well with the inked edges.


 There is no right or wrong way of making these tags. I used the lightest chipboard available, my Tim Holtz Tattered Flowers Die, My Tim Holtz Tag Die, a Spellbinders labels die, pearls and hat pins, Tim Holtz masking tape, various stamps and inks and my homemade "shimmer" mists. You can chose to use whatever adhesives you like, I tend to stick with (punny!) using glue dots and foam squares for immediate gratification! The best things about these is that you do what you want and no matter what, it still looks great!


The DIY Show Off
A Marvelous Mess


Enjoy and have a happy Monday,
Viviana

Sunday, March 6, 2011

Home Made Glimmer Mist and Even Glimmer Glam

As you all may have already figured out, I am a frugal crafter....I try to get it on sale, on clearance, with a coupon or even trade it. Sometimes I spend $$ when it is to save somewhere else. In this case, I bought some paints, full price (between 2.50 and 3.50 each!) but they did not break the bank.
When I saw this post, HomeMade Glimmer Mist by Shoegirl's Creations....I, of course had to try it. I have a huge issue with paying so much ($8-10) for something I can make for myself for ($1 or 2). I gathered up my supplies (she has a list of what you will need in there) and got making the stuff.


I chose 4 colours I did not have at all in my small and frugal collection of glimmer mists.

You can see the shimmer at the bottom of my mini mister.
This is the blue once it was dry.
The bottle I re-used was a nearly empty body spray mini, perfect for this project!

I sprayed them all on kraft chipboard, the shimmer of the green is a gorgeous golden green.
That was the pearly one, which is my fave, as it looks like the one called Marshmallow from Tattered Angels.
I made this one with paint and modpodge.
 Once I had made 3, I decided to venture out and try to make a matte mist, like the chalk ones Tattered Angels makes, I wanted something in pinky and pretty, so I used about 2 tablespoons of pink and one of Modpodge and I got the results I wanted.

I have a layer of green shimmer, then I masked it and added the pink matte spray, the results are stunning!
This is the Extreme Glitter diluted in the water.
I did the Extreme Glitter the same as all the others, I diluted it in water in a small jar, but I noticed the particles were much larger... *light bulb* ... just like Glimmer Glam!


It has the sparkle of Glimmer Glam, at a much smaller price.
So all of them are just diluted, nothing else in the mix. I did notice that they are of course not as pigmented as some of the real Glimmer Mists, but then again, I find that sometimes less is more. I am going to add some re-inker to the glimmer glam, to make it brighter...I'll see how it goes. Thus far, I am loving the results and the fact that I can make more when I run out. In the mean time, I have been creating all sorts, so come back and look later on, I'll show you what I've done!

I'm linking up to,


Also, I'm going to have to figure out how to make the Glimmer Glaze, how hard can that be??
Cheers,
Viviana

LinkWithin

Related Posts with Thumbnails